Integrate Basic Setup
This guide will help you create your first integration using the Integrate feature, learn how to upload files through the platform and automate uploads using a cloud bucket. This process is the same across all integration types.
To access the Integrate feature, navigate to the Integrate tab on the left side of the Scope platform.
If you cannot access the Integrate feature, please contact [email protected].
Scope3 partners may need to enable the feature via the Admin UI.
Sample data and settings
Below is an example of input data. The file includes impression delivery data for two publishers.
Field names cannot start with a number or character. For example, +datewould be invalid and fail to upload.
row_identifier  ,date       ,impressions ,inventory_id    ,channel ,country
theguardian-web ,2024-01-05 ,       1000 ,theguardian.com ,web     ,US
cnn-web         ,2024-01-05 ,       1000 ,cnn.com         ,web     ,US
1. Create a Schema Mapping
To begin this process, we must first create a schema mapping, allowing us to map the fields you use to their appropriate counterpart fields in Scope3.
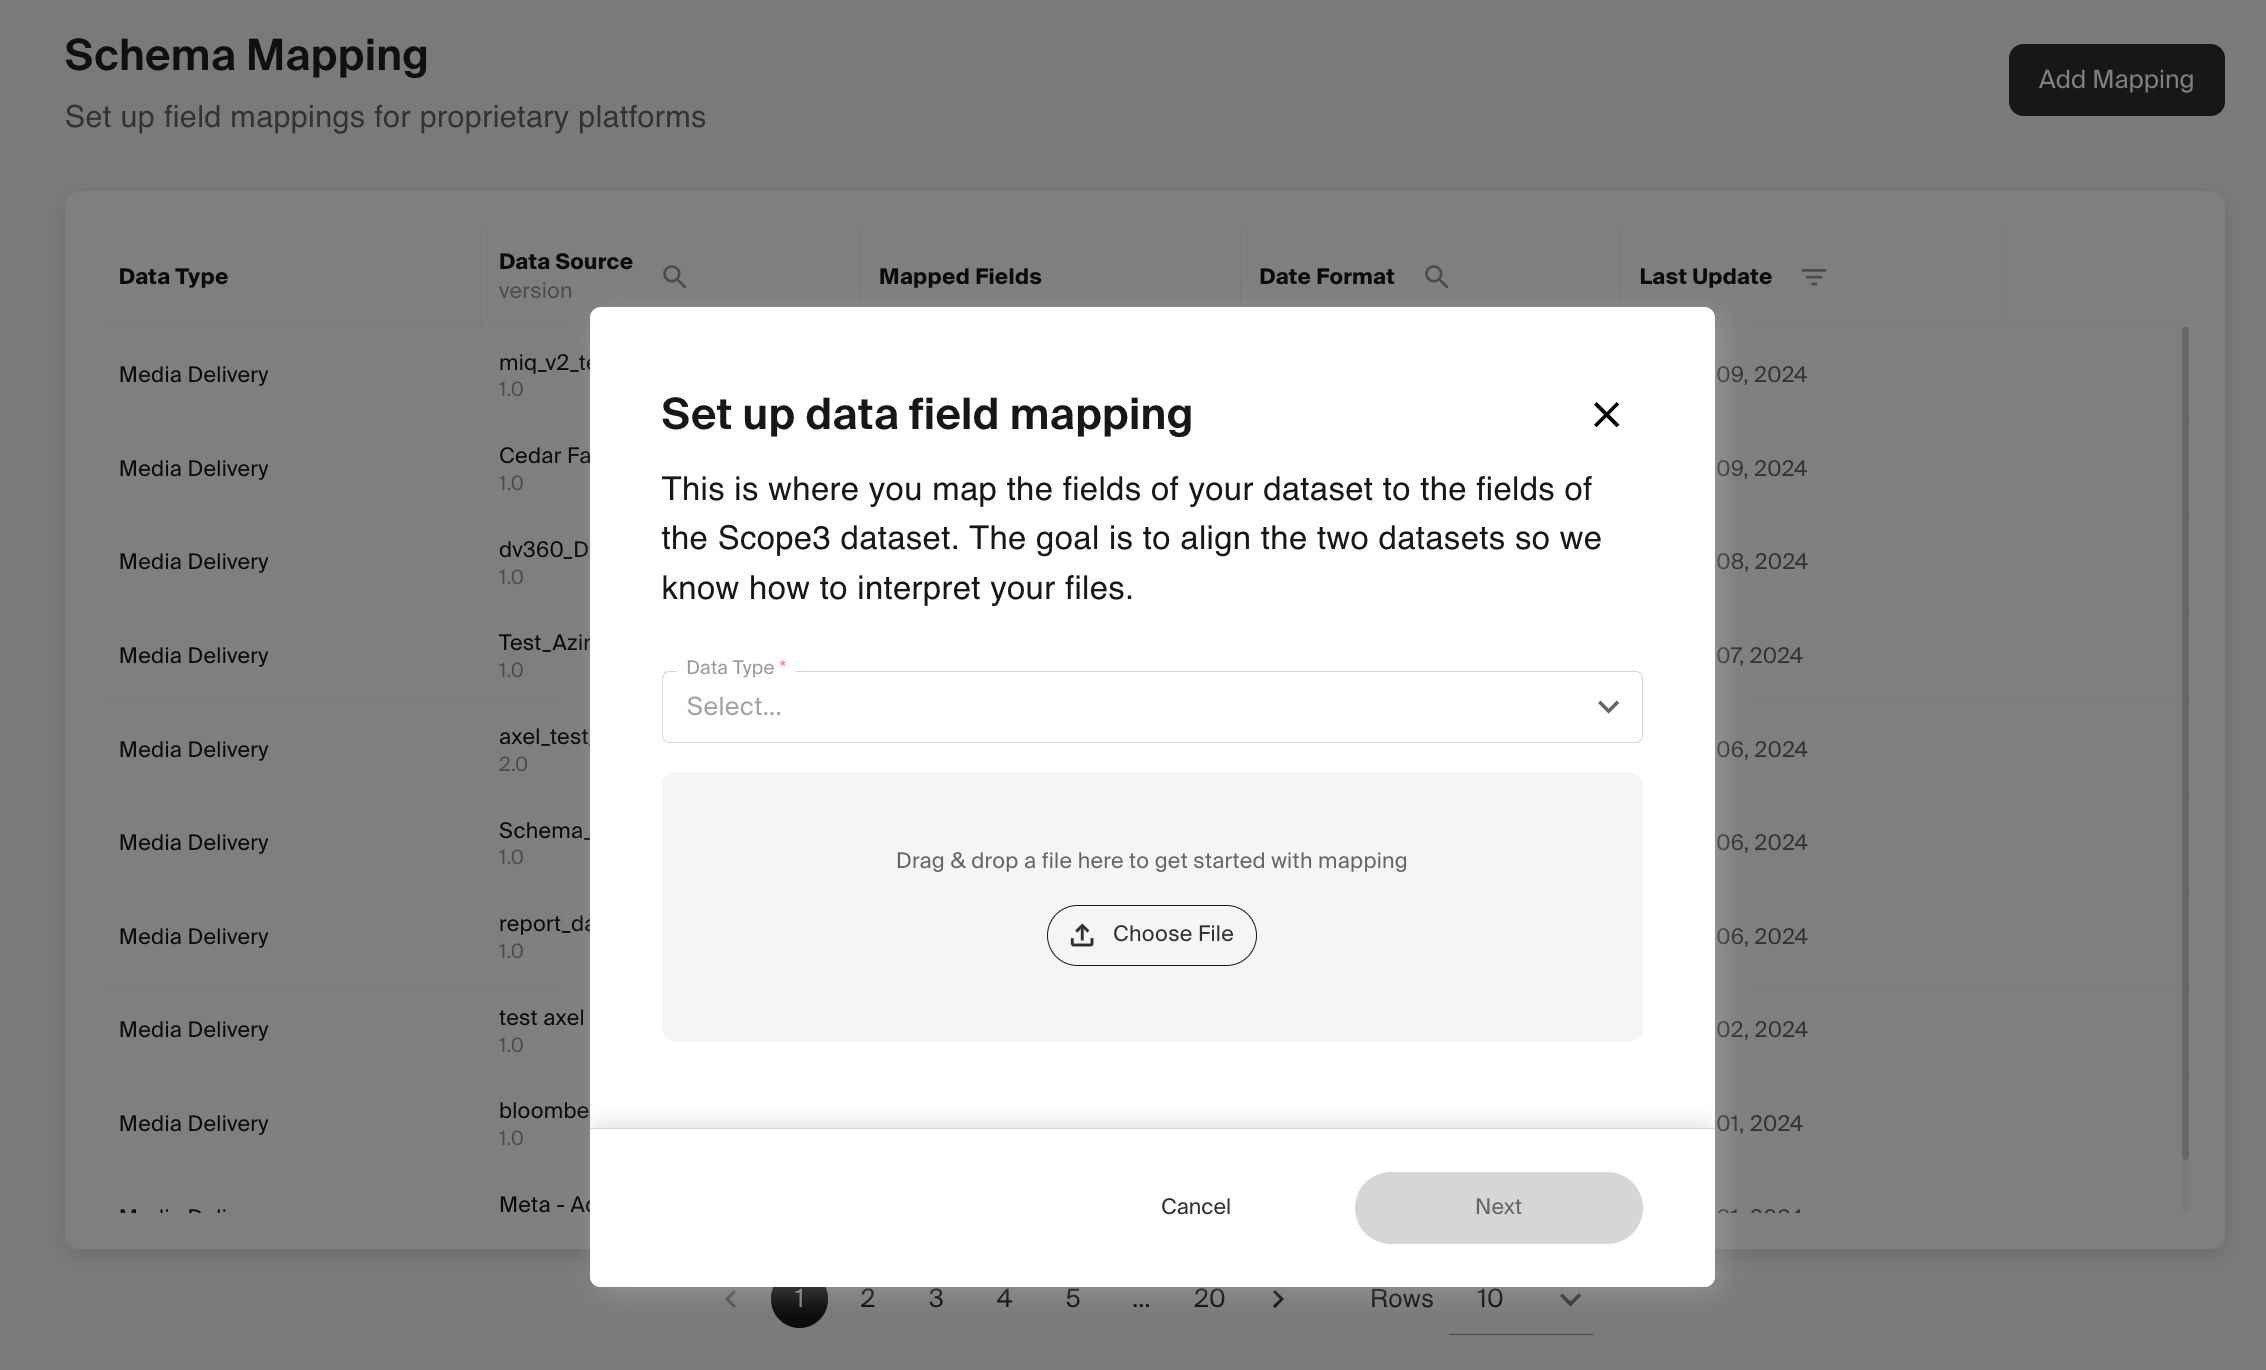
To begin, we will first create a new schema. Navigate to Integrate > Schema mapping and click the Add mapping button.
Select your intended data type From the Data Type drop-down field. Click the Choose File button and select the input file you want to use for your field mapping.
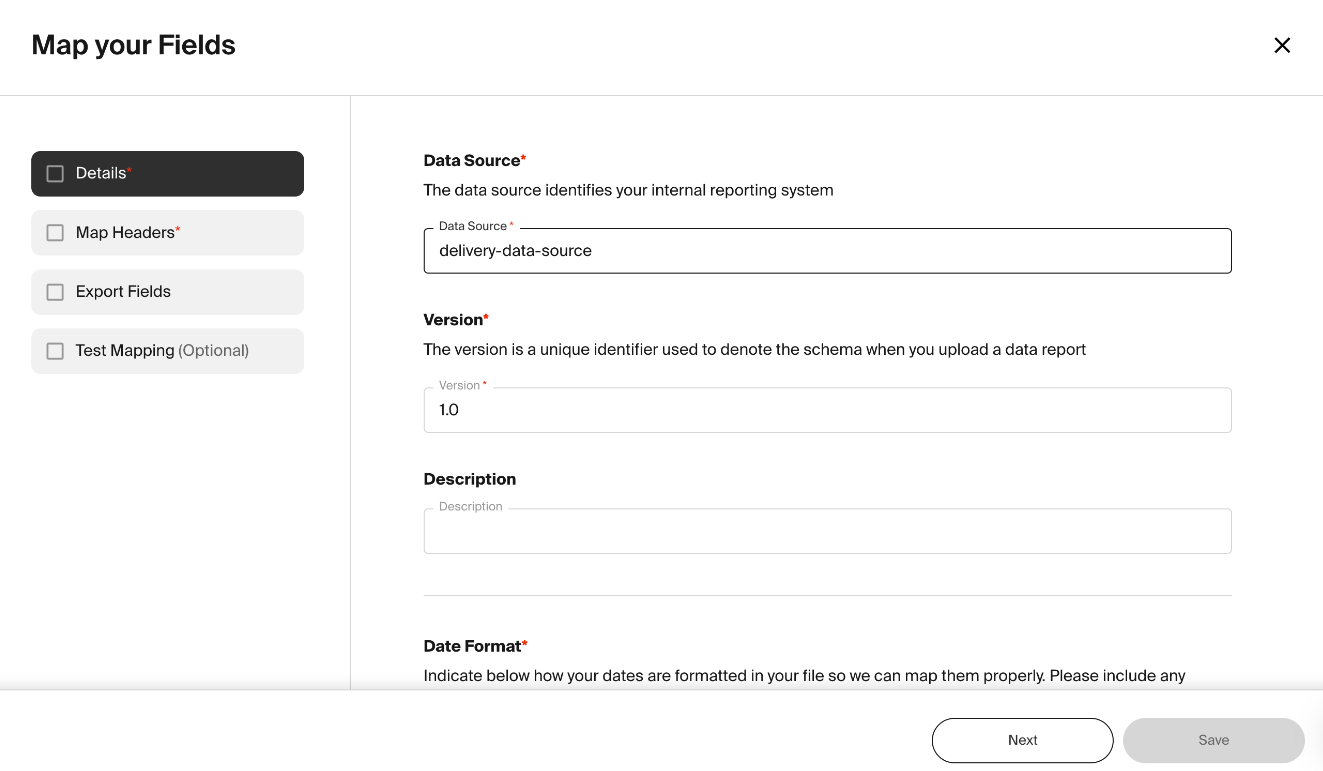
Details
In the Data Source field, provide a name for the schema, along with a Version and Description for it.
For the date field used in your input, select the correct date format, as incorrect format selection can cause errors.
The data format in our example data is yyyy-MM-dd. However, many other formats are supported in Scope3, as long as they are selected correctly in this process.
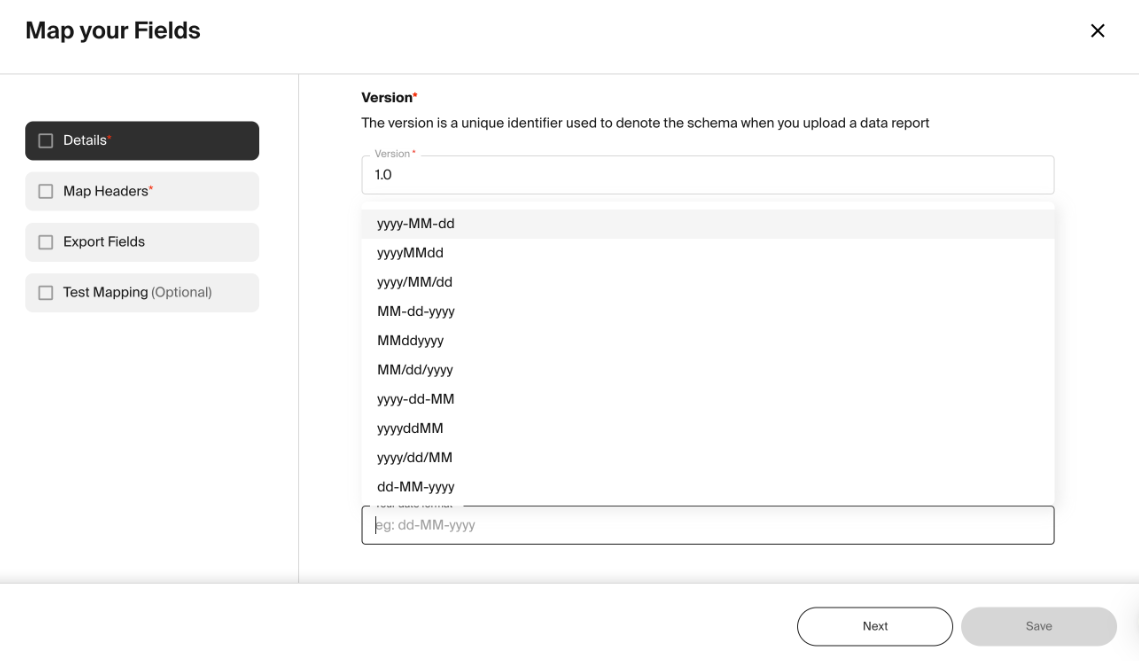
Click the Next button to continue to the next step.
Map Headers
The Map Headers section is where we will map the column headers from our uploaded file to the fields required by Scope3.

From the Scope3 Field dropdown list, select the field that aligns with the headers in your file.
When all fields are mapped to your liking, continue by pressing the Next button.
Map Values (if toggled)
Value mapping enables you to bring in fields and values from your ad tech platform and map them to Scope3-acceptable fields.
Device types from platforms are often reported as mobile phone, desktop, connectedtv, iPhone
whereas Scope3 accepts fields for device type as phone, pc, tv
You can map your platform values to Scope3 values by inputting them into our accepted fields.
On the left side, you will see the fields to provide the values found in your uploaded file. On the right side, you will see dropdowns with the Scope3 fields that can be mapped to each value.
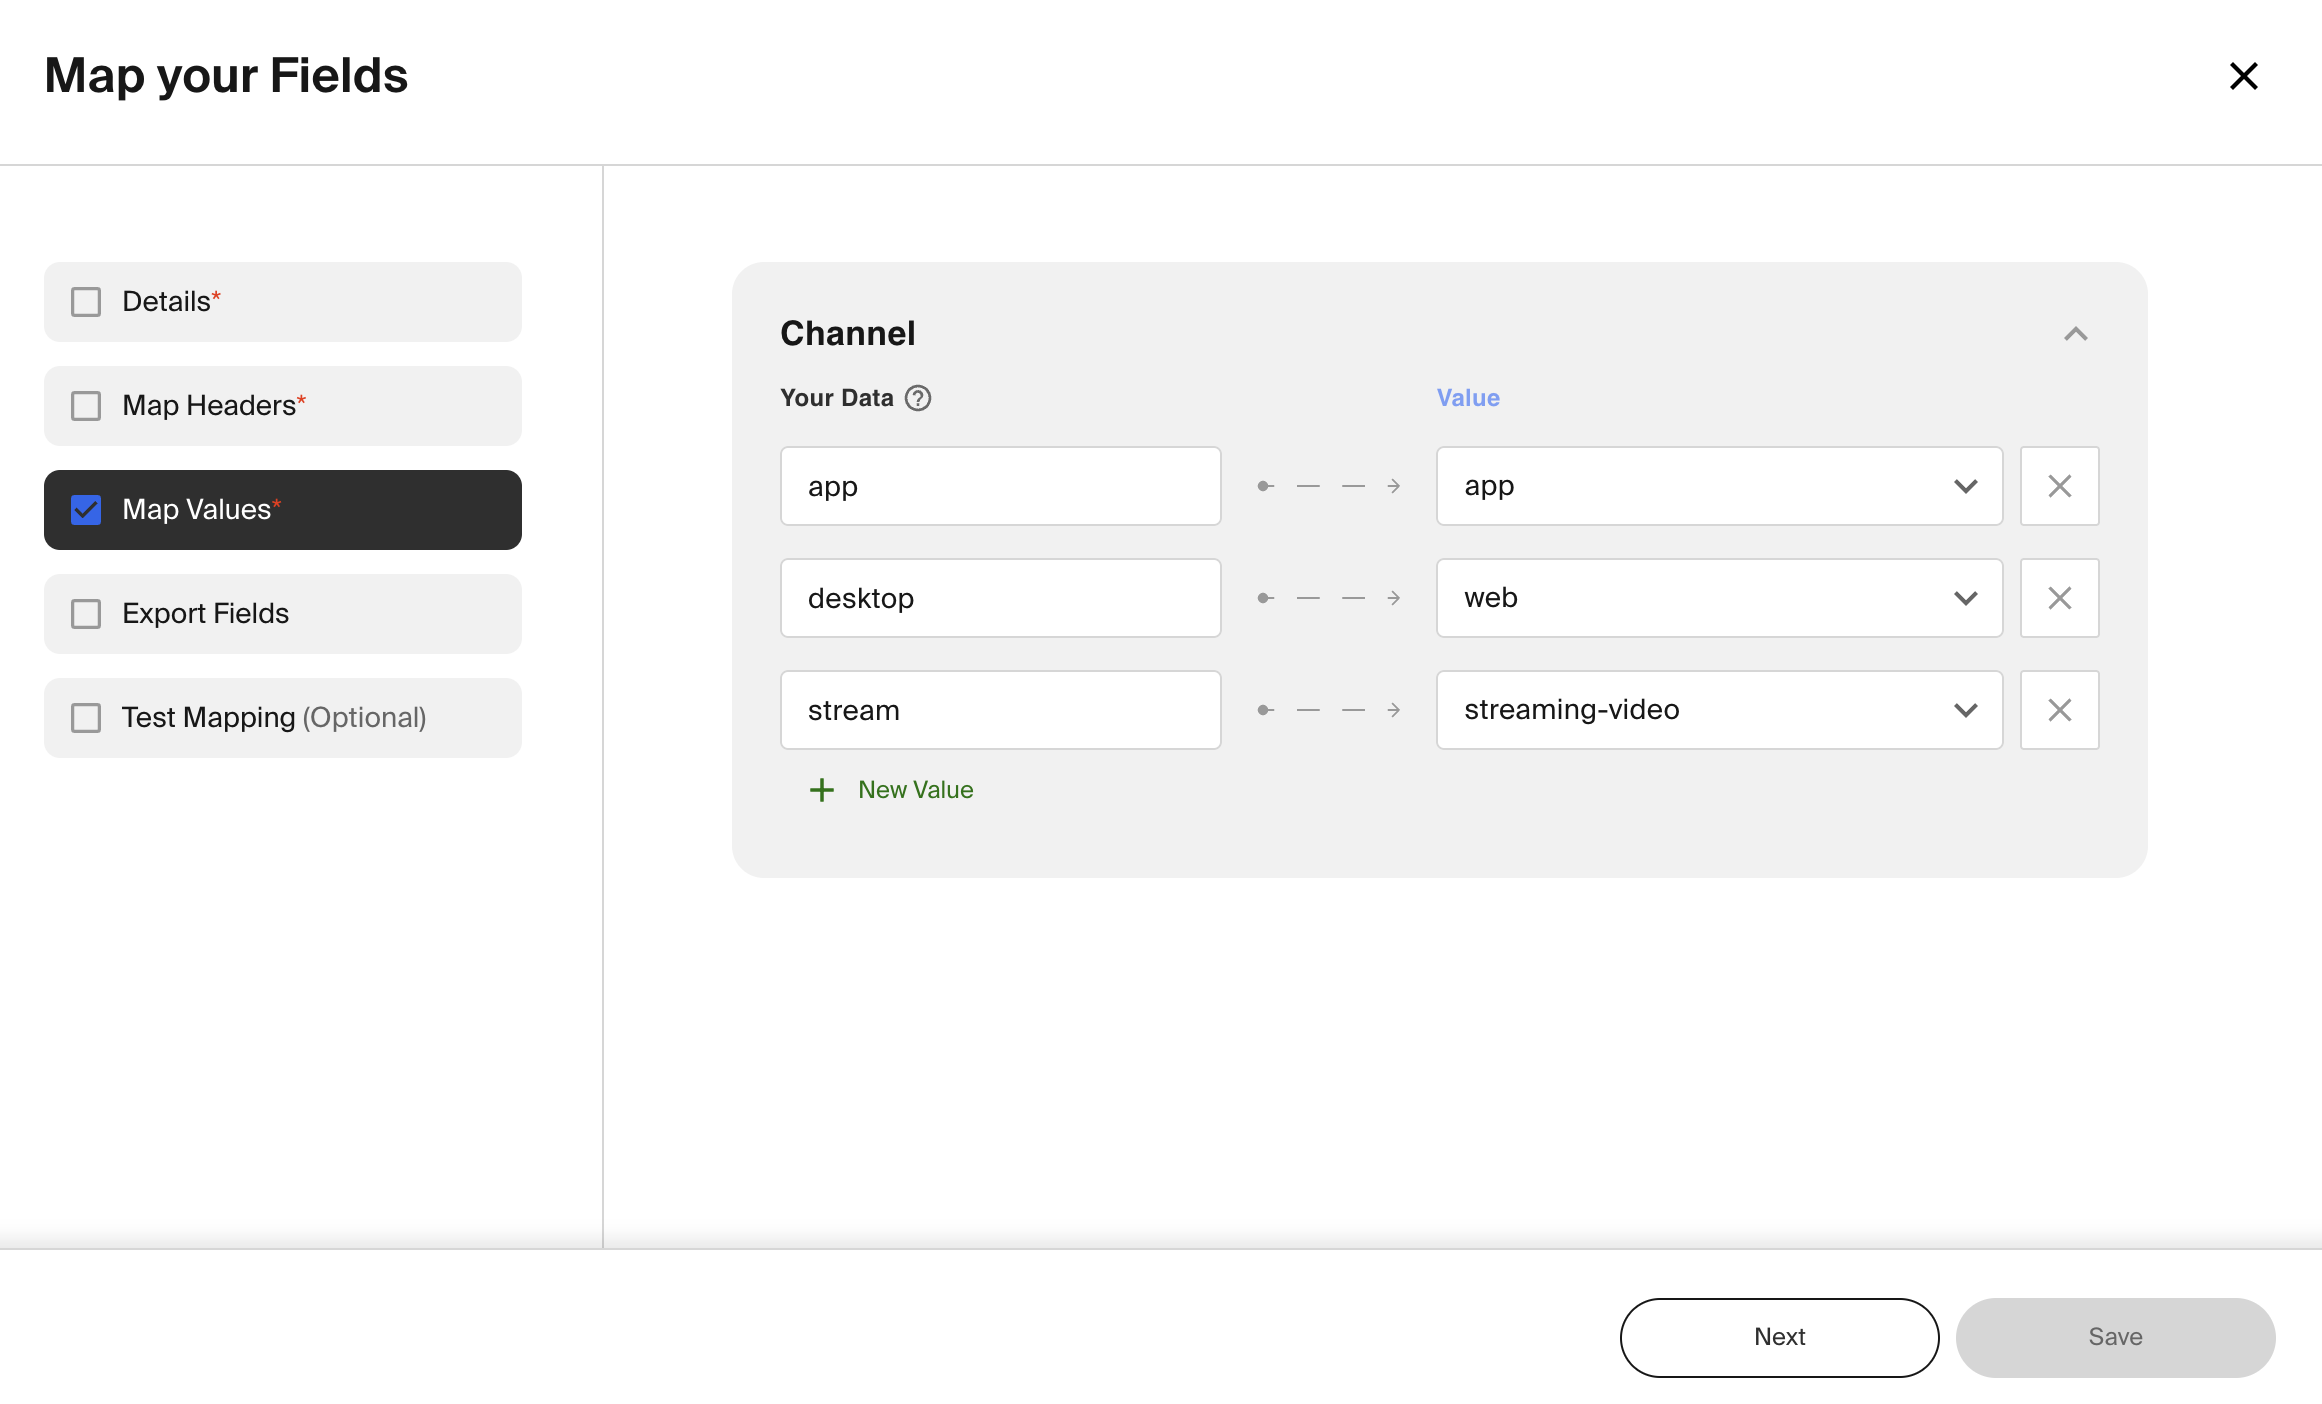
From the Scope3 Field dropdown list, select the field that aligns with the values in your file.
Value mapping is available for the following fields:
device_typeapp_storechanneltransaction_methodnetwork
When your values have been mapped to their Scope3-acceptable values, click the Next button to continue to the next step.
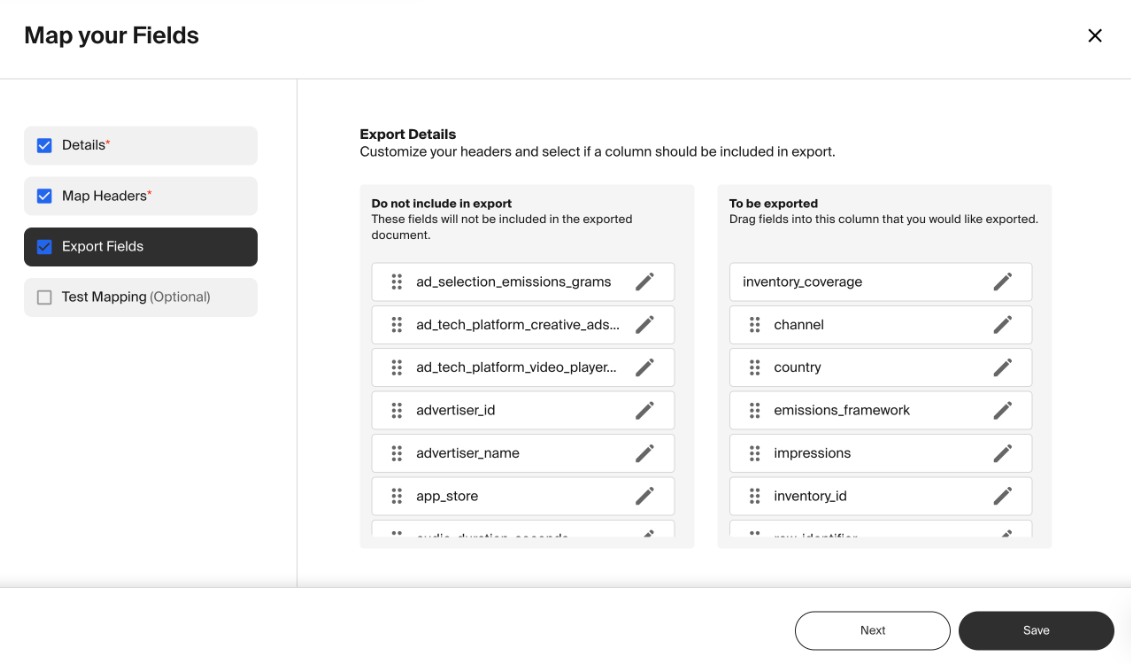
Export Fields
The export fields section is where you can configure the output report. Drag any fields you wish to see in the final report into the To be exported column. Consumer device emissions numbers can be added to a report here. Include parser_error and calculation_error if you wish to see detailed error reporting.
When the fields have been mapped, we can test the mapping to confirm that the headers have been mapped correctly.
If you do not wish to test your schema mapping file, click the Save button to finish saving it.
Otherwise, click the Next button to proceed to the next step, where we will run the test.
Test Mapping
Testing your schema mapping is optional, but Scope3 suggests regularly testing any new schemas to prevent any issues in your integration process.
The test upload only allows files up to a specific size, which will depend on the amount of rows, columns, and content within the file. If you run into an error, Scope3 suggests reducing the file size used for testing and rerunning the test.
To run the test, click the Test File button. The test will begin immediately.
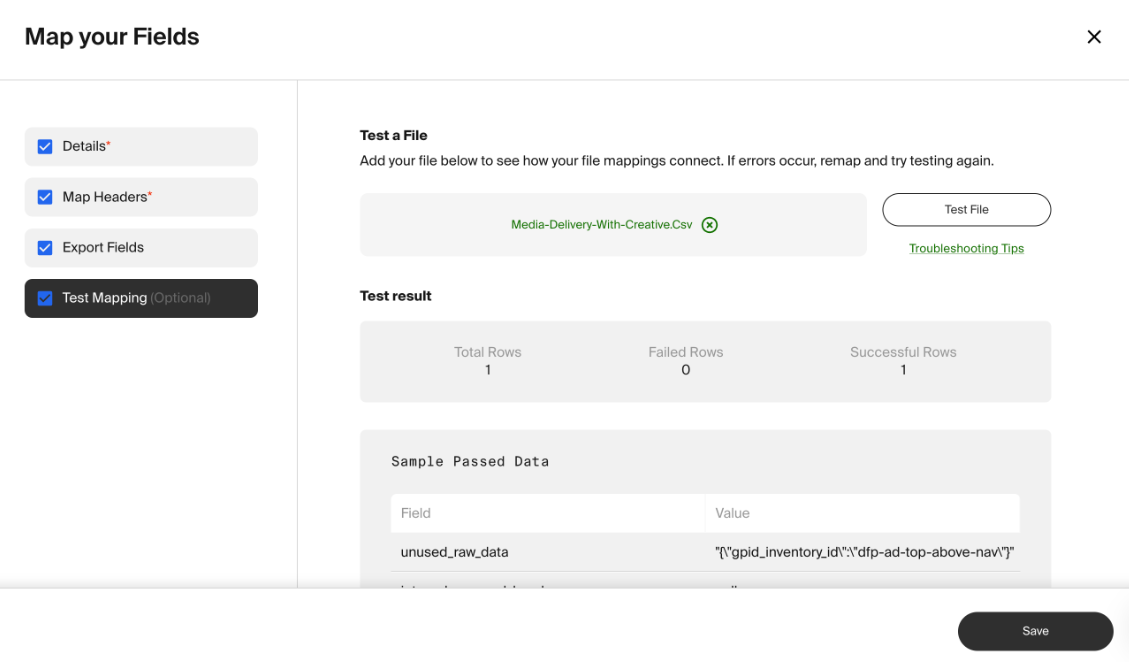
Once the test has been resolved, the results will be displayed in the Test results section, including any issues with the file. This will allow you to make adjustments and continue troubleshooting until you have a file suitable for use in Scope3.
Once you have reviewed your successful test results, click the Save button to finalize your schema mapping.
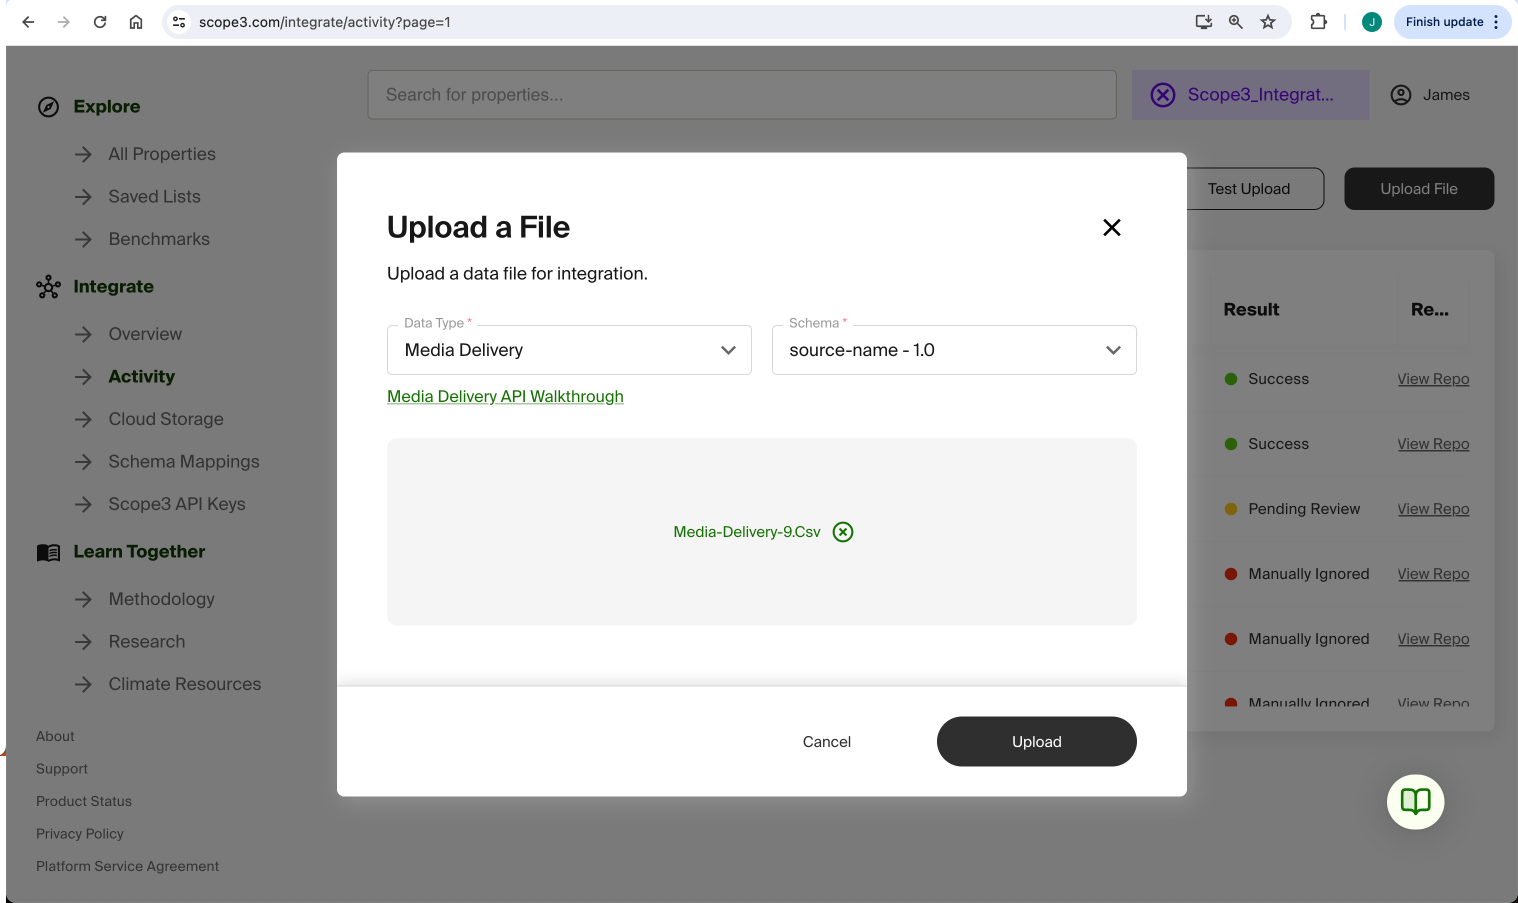
2. File Upload
Once a schema has been created, files can be uploaded by navigating to Integrate > Activity page.
Select the integration type and a valid schema, and upload your file. Successfully uploaded files will have reports generated and are viewable by clicking the View Report button.
3. Create a Cloud Bucket (optional)
The next two steps involve automating the previous steps using a cloud bucket.
Before setting up your bucket, ensure it has the correct permissions for your provider, as outlined in the Scope3 Cloud Bucket Configuration documentation.
Navigate to Integrate > Cloud Storage. To add a new bucket, click the Add Bucket button and select your appropriate platform from the Platform dropdown list.
Please provide all required information, including that bucket's Bucket URL and Description, and select ‘Read/Write’ from the Permissions list.
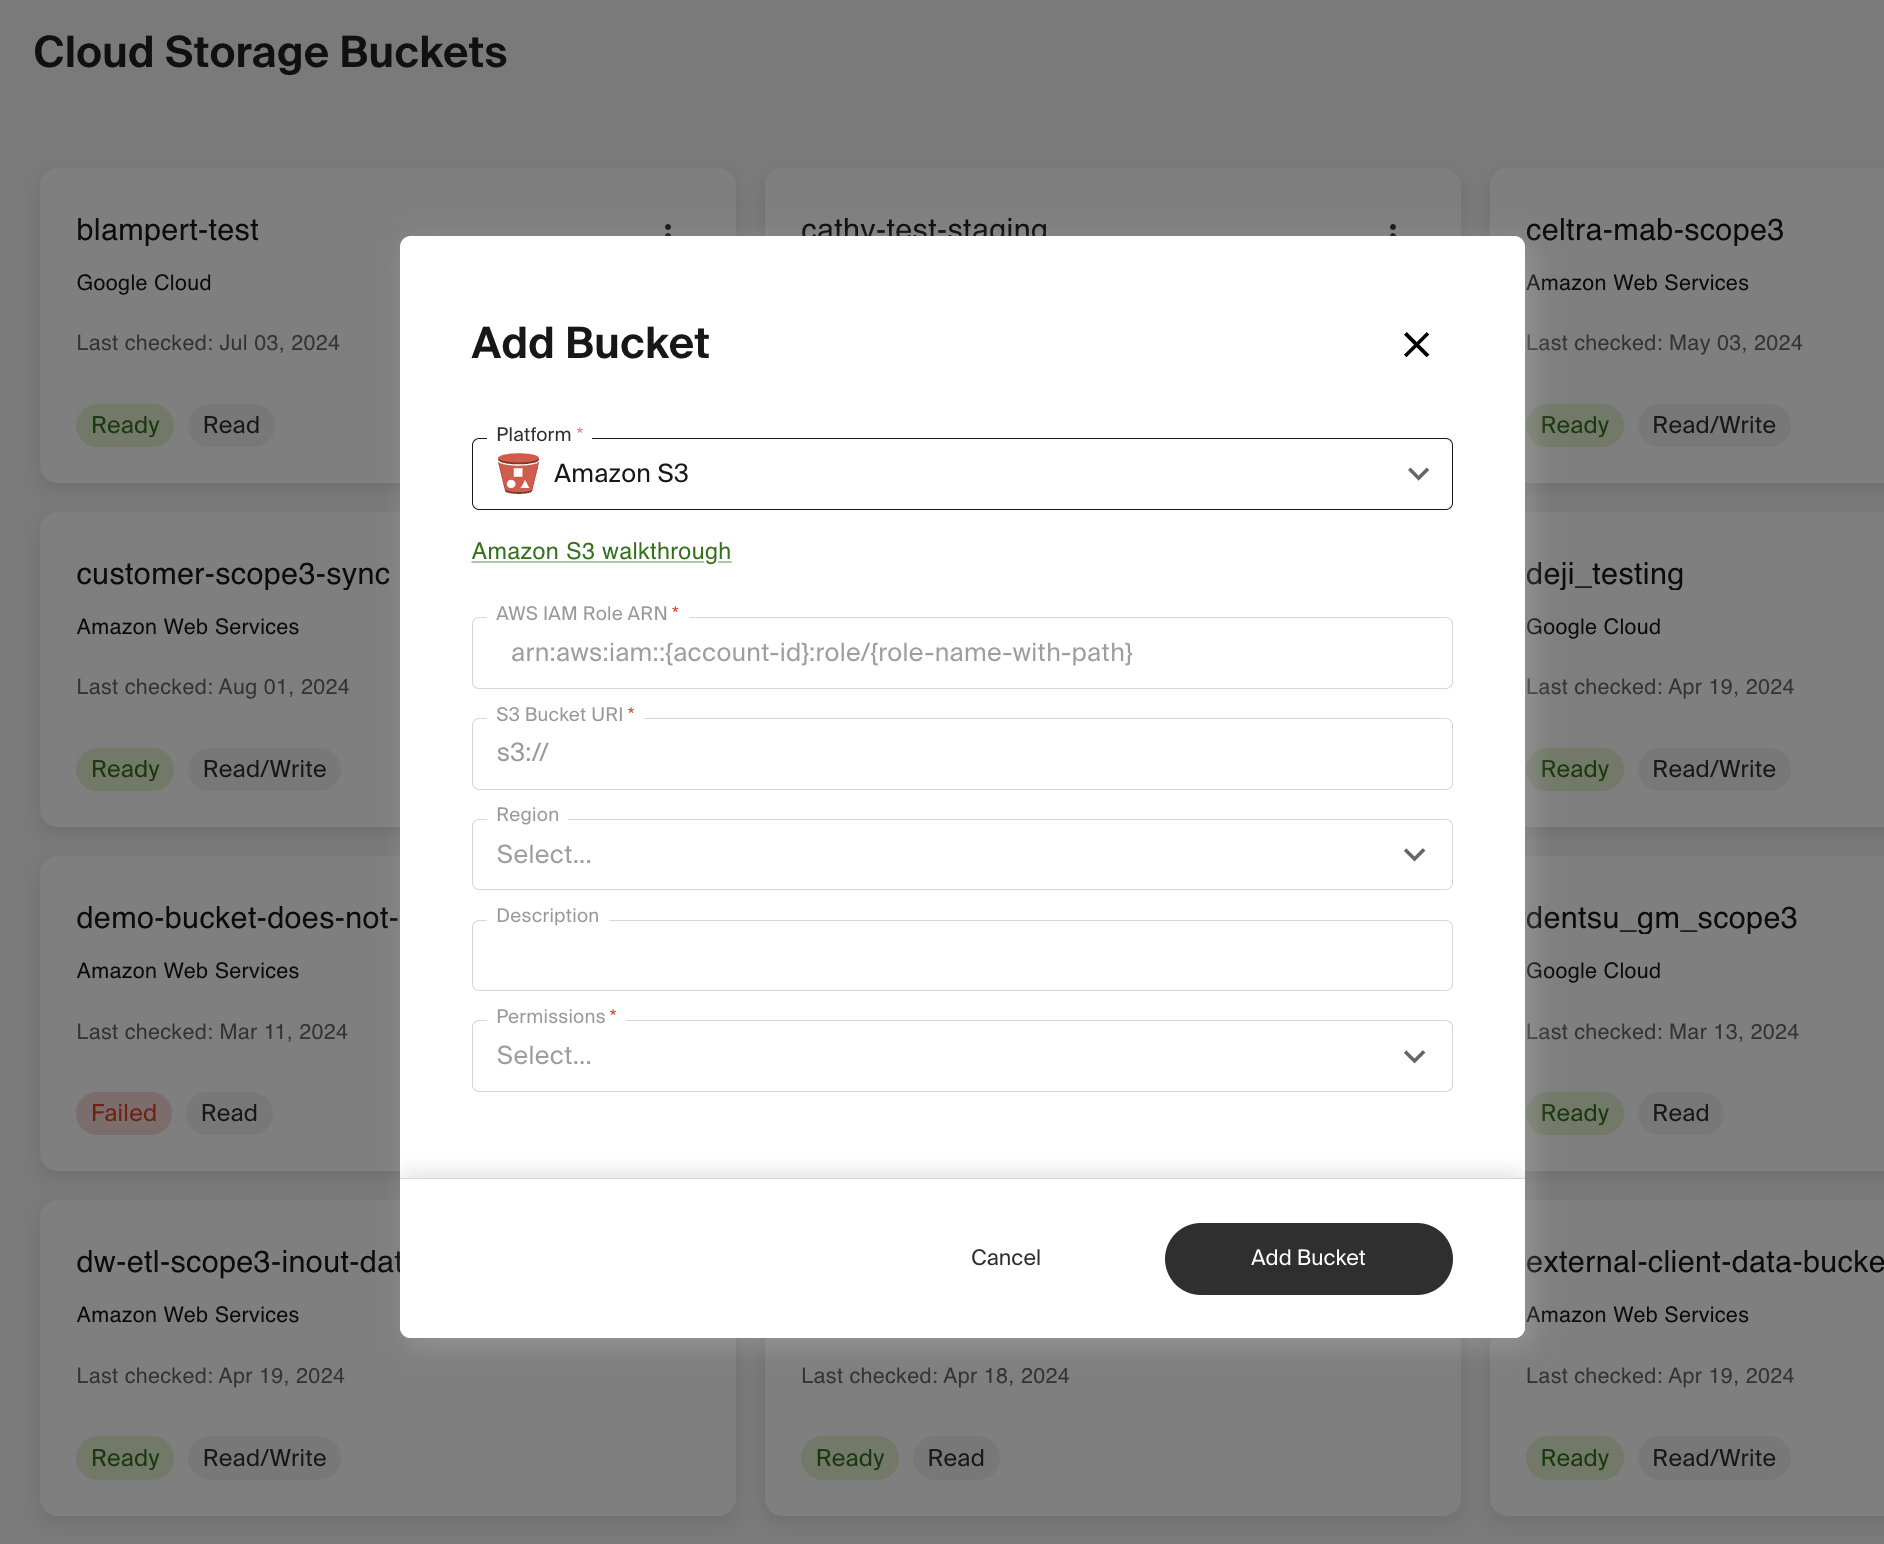
When all fields have been filled and chosen, click the Add Bucket button.
4. Setup Automation (optional)
To create an automation, navigate to Integrate > Overview and click the Add Automation button.
Toggle whether your Uploaded files require manual review.
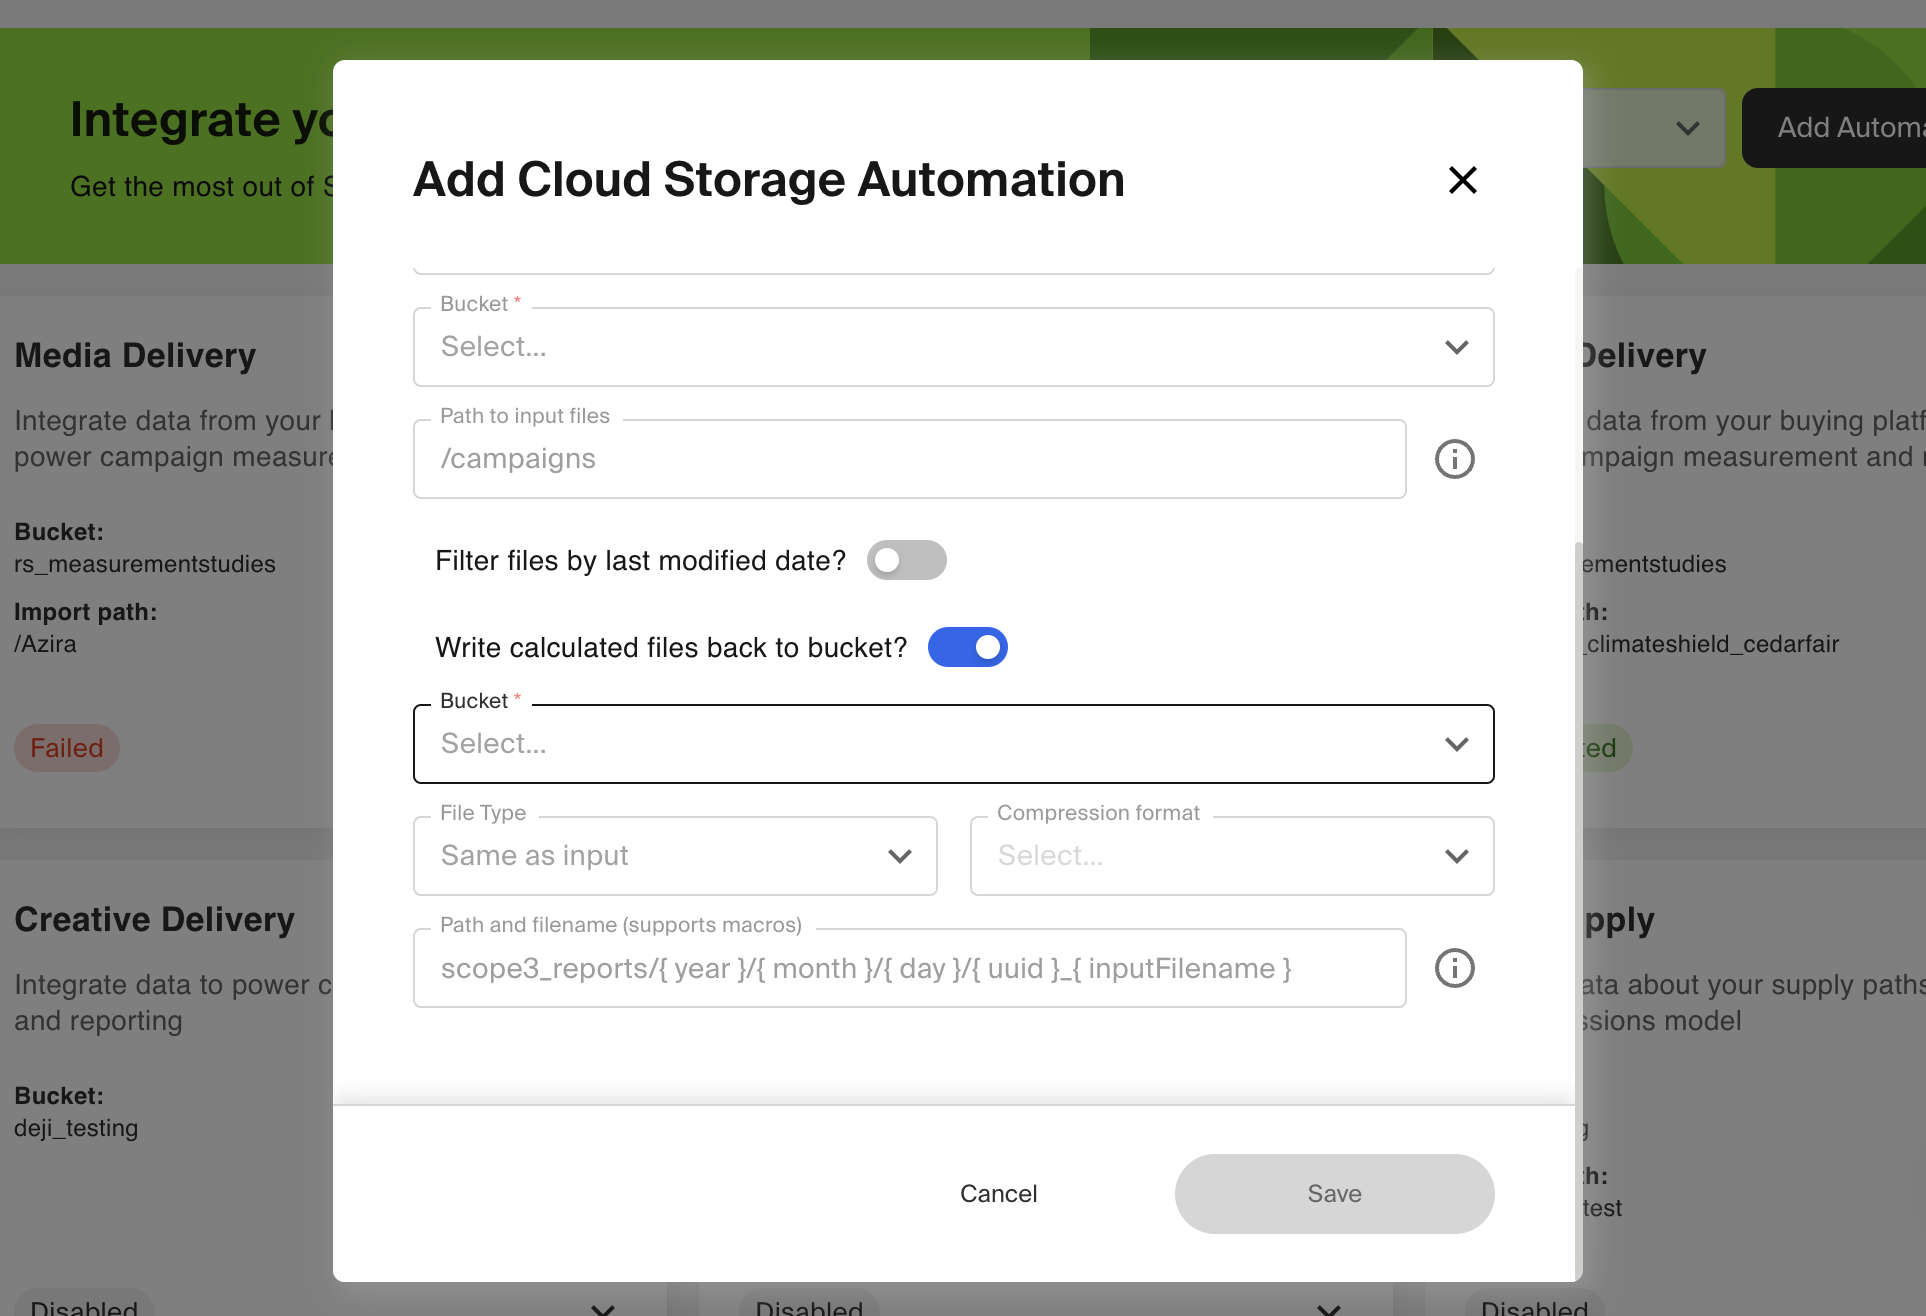
Select the Data Type from the dropdown, select the Schema and Bucket to use in this automation, and provide the file path for input files.
Also, please choose whether to Filter files by last modified date and, if so, provide the Last modified condition and Last modified date.
Choose whether to Write calculated files back to the bucket. If you choose to do so, please provide the Bucket, File type, Compression format, and the Path and file name to use when writing those files back.
Please use the {uuid} macro when providing the 'Path and filename' to prevent data from being overwritten in this process.
Click the Save button to finish saving this automation.
Now that the automation is saved, it can also be edited, refreshed, or disabled as needed by clicking the ... button and selecting the appropriate action.

5. Push the file
With the automation saved, we can push the file to our now-enabled cloud bucket. Each file should have a unique name. For example, if data is delivered daily, then scope3-delivery-data-2024-06-06 would be a sensible naming convention.
The integration checks your bucket every hour for new files. Duplicate files — those with the same file name — are ignored. Scope3 does not delete files from your bucket; you do not need to delete them manually.
Please navigate to the Integrate > Activity page, click the file, and accept it, as only accepted files can be pushed back.
Disabling the Uploaded files require manual review toggle will allow for automating the file push in this process.
6. Review response
Scope3 checks buckets for new files every hour. For testing purposes, it may be beneficial to see more immediate results to review the success of the file push automation.
To immediately run the file check, click the Refresh data button, pictured below. The data will be pulled within a few moments.
Once the data has been pulled in, you can review how well the automation worked and feel confident that you will receive automated reports as expected.
Updated 11 months ago